
Nail Art Step by Step: Fierce Flame by Glitterbels
Glitterbels have released a brand new and fabulous collection of six rocking shades - introducing the Glitterbels Rock Chick Collection! Stand out from the crowd with the latest Glitterbels Hema Free Gel Polish shades taking inspiration from leather jackets, ripped jeans, and studded belts. This range of punky polishes are just what you need for the upcoming festival season!
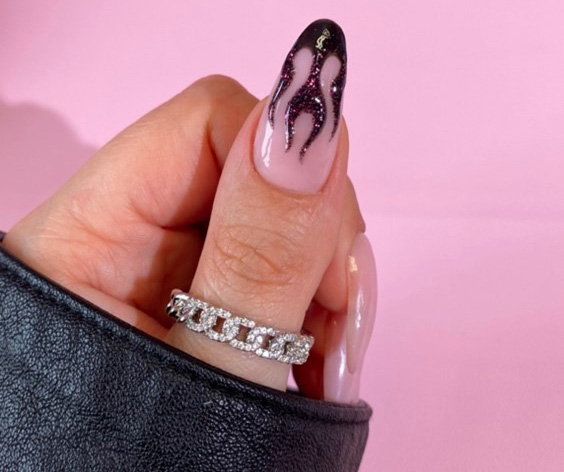
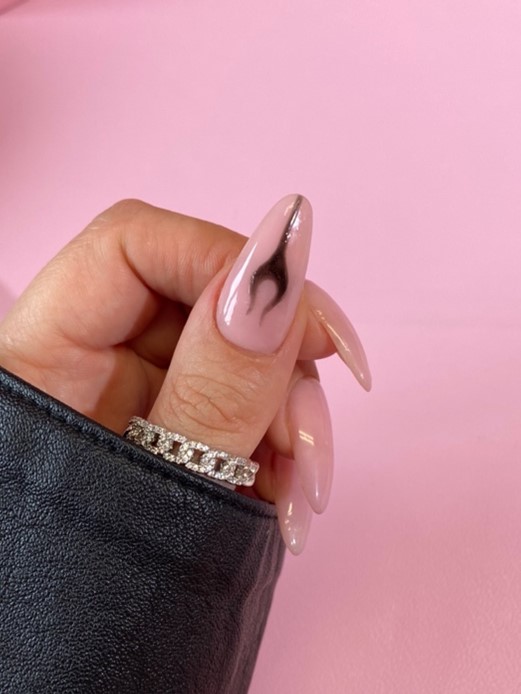
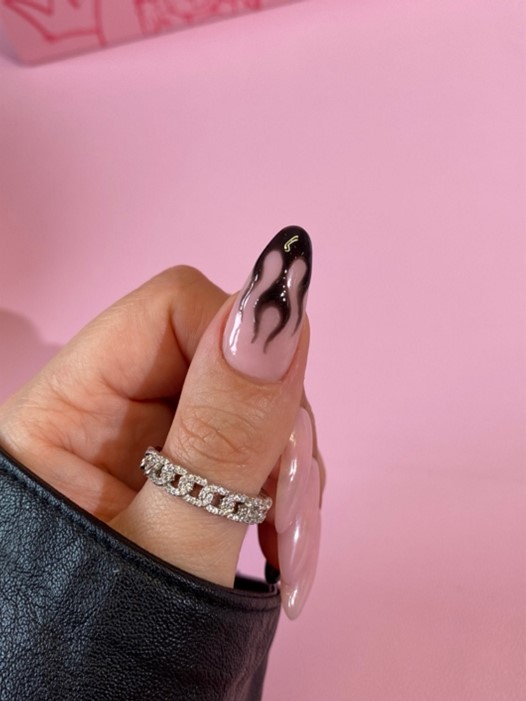
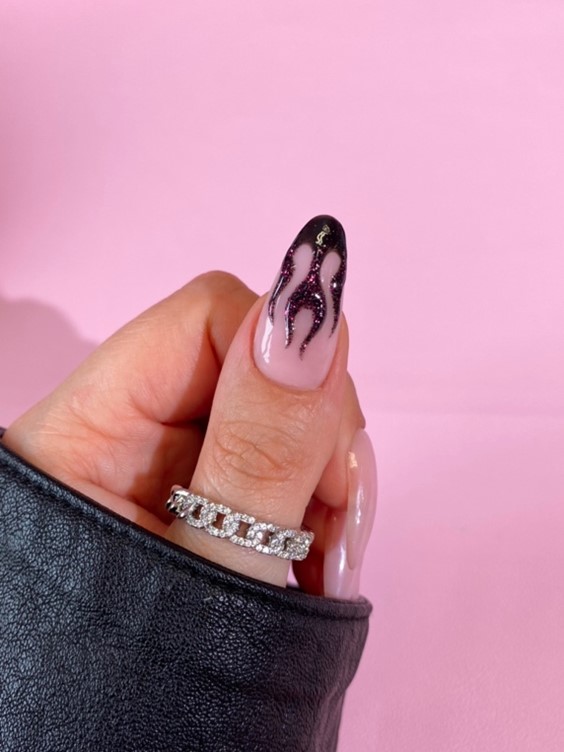
If you are looking for some inspo on how to wear this gorgeous range, look no further. Our fabulous content creator at our Glitterbels HQ, @staceymachin, created this gorgeous flame look using shades “Stage Lights” and “Fan Girl”. This hot-to-trot nail art sits over a base of “Sweet Pea” from our Hema Free Builder-bel Gel Collection. If you want to learn how to re-create this flaming look, in under 10 steps, keep reading.
 Step 1
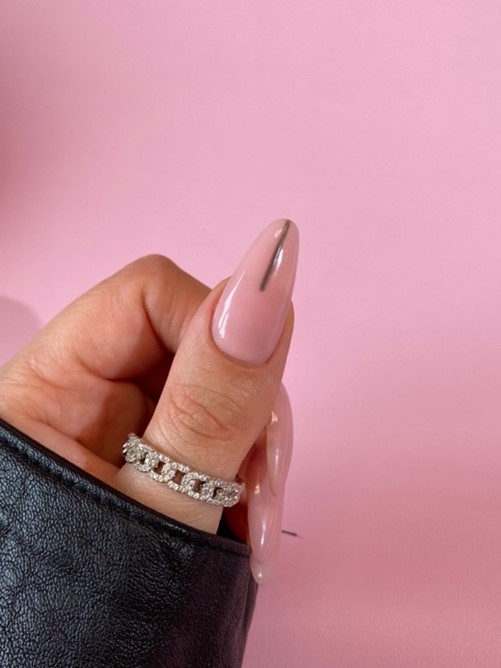
Once you are happy with your prep and your base colour is applied, paint a thin line from the tip of the nail to the middle of the nail. This must be in the shade you want your flame to be. We decided to use shade “Stage Lights” for this.
 Step 2
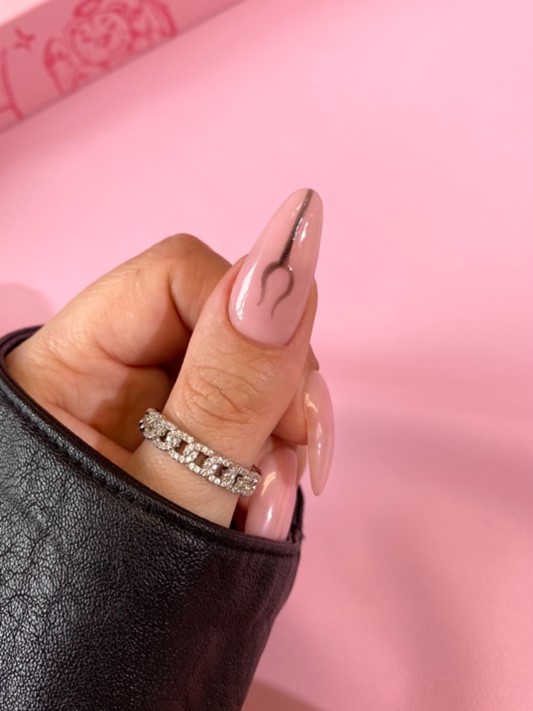
Once you have drawn your line, paint a “U” shape on top of it. This will create a pitchfork type of look, for the best results, we recommend having the sides of the “U” shape taper in and then out slightly. This will give your flame nail design a realistic look.
 Step 3
The next step is to thicken the lines and fill out the shape. We recommend working in curved lines, by gently swiping your brush across the nail. It is important for the tips of the flame design to be thinner at the top and thicker at the bottom.
 Step 4
Once you have the middle flame completed, this will act as an anchor point for the rest of your design. The next step is to paint a line that curves from the thinner base of the middle flame, be sure to add some bends in the line as you work your way out and up.
 Step 5
Replicate this second line on the other side of the middle flame and thicken the lines up. Once you're happy with the shape and coverage of your flame, cure in the Glitterbels lamp for 60 seconds.
 Step 6
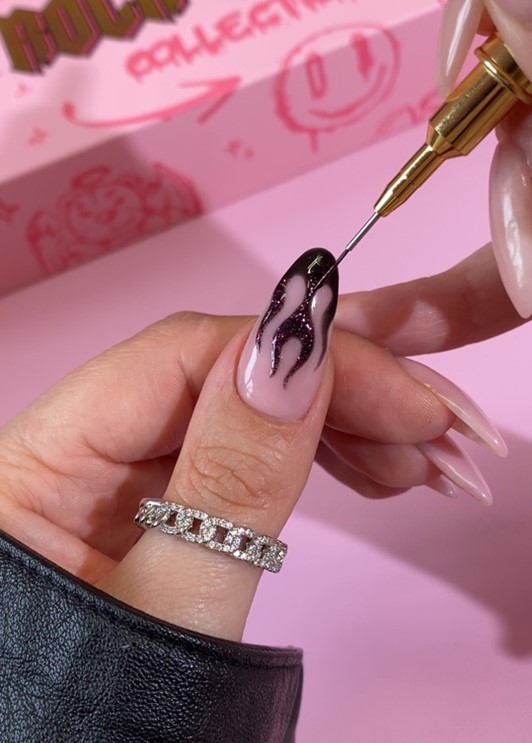
It wouldn't be Glitterbels if we didn't add a bit of sparkle to this punk princess look. Using the Glitterbels 9mm Fine Liner brush and shade “Fan Girl”, we are ombre-ing the glitter gel down the flame design, from the tips, to the base. When you are happy with the placement, cure again for another 60 seconds.
 Step 7
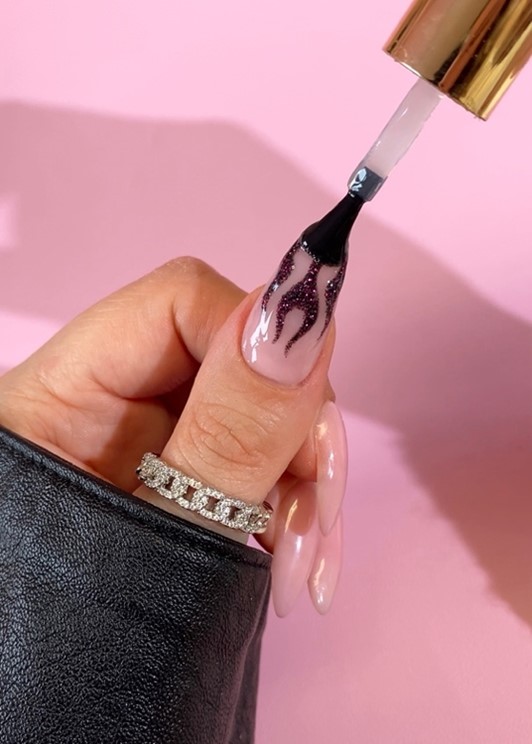
After your design is cured, apply a layer of the Glitterbels Hema Free Topcoat. Be sure to cover your design completely, this will help you protect the design ensuring a long-lasting finish. Cure your topcoat in the Glitterbels lamp for 60 seconds.
 Step 8.
If you are happy with the fiery look, you can stop at step 7. However, if you are looking for a hint of 3D design, stay tuned. Using a 9mm Fine Liner brush, and the clear Glitterbels Hema Free Builder-Bel Gel in shade “Crystal”, we apply this product over the area of the design. Once you are happy with the placement, cure for 60 seconds.
If you re-create this look, please be sure to tag
Glitterbels in your posts on social media.
For more inspo and all the latest news from Glitterbels, please click
here.
Glitterbels